My multi controller stopped working after some humidity got into it (snow). The right arrow stopped working, but the rest was working fine. After a few weeks of researching I decided to take the risk and try to fix it myself. Here's how I did it and a few tips for those who want to try the same.
Let's start with good news. This is not complicated to do -- assuming you don't have two left hands and take your time to prepare and do everything carefully. There is also plenty of information online on how to open the camera so you know in advance what to expect.
The only part you need to buy is the multi-controller + "Set" button assembly. Unfortunately it's not so easy for find separately. I bought it together with the back cover from LondonCameraCenter.com for £79 + shipping. I was able to find it separately on AliExpress for $49.9 including shipping but it came from Asia and did not want to way that long. Ebay didn't return any results for my keywords and I gave up quickly. If you find it elsewhere cheaper, please let me know - I might order one to have as backup. There is also a small chance you might be able to fix the button without replacing it (see the last photos), but I cannot guarantee that will work. My recommendation: buy the button separately for the best price you can find. I would even buy a knock-off if possible since it's just a switch.
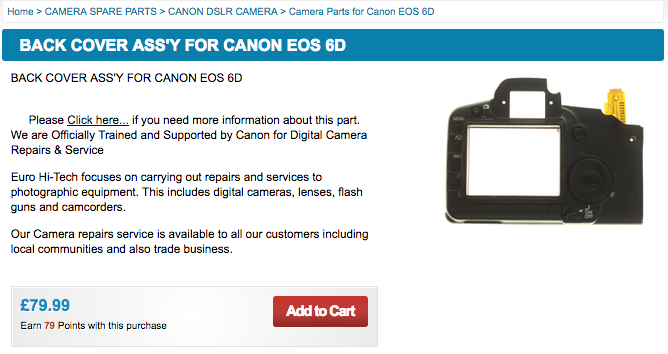
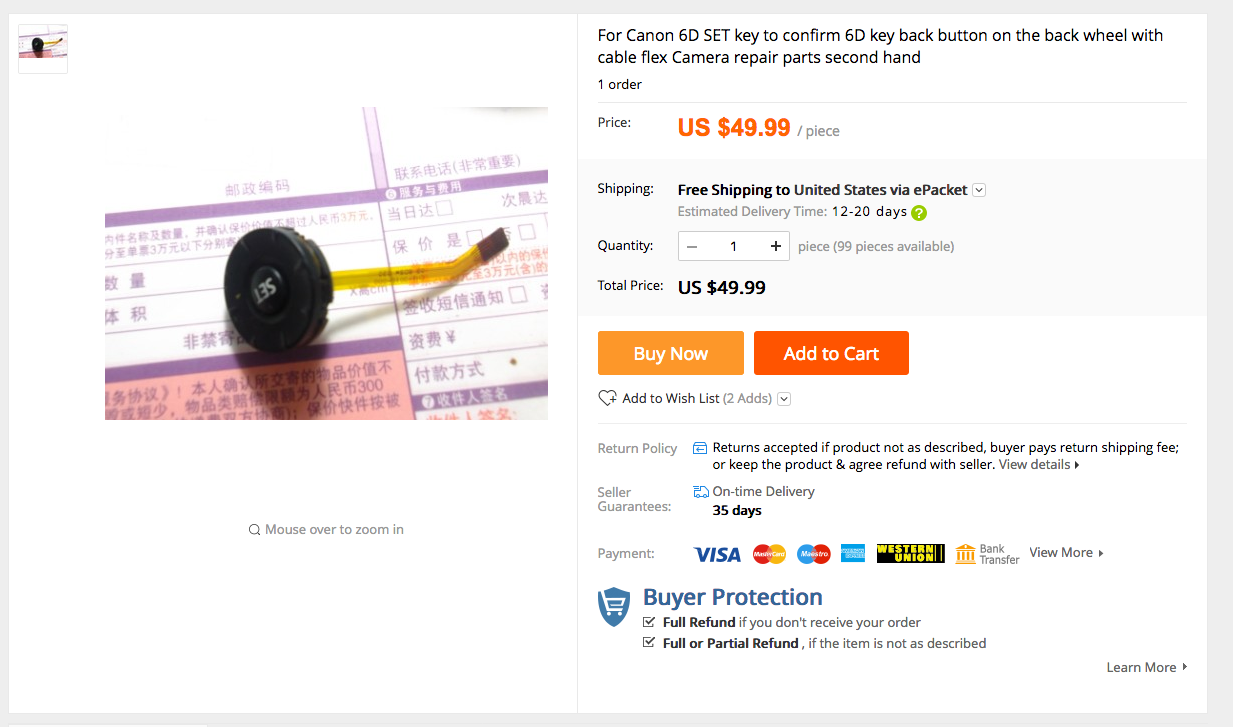
After you have the button, you'll need the following:
- Phillips #00 Screwdriver (optional - to make your life easier: a small magnet to keep the screws stick to the screwdriver head if the screwdriver doesn't have it build in)
- Paper + double sided tape to keep track of screws (you have to unscrew 13 of them)
- Normal adhesive tape to make your life easier when you connect the new button's ribbon cable
I didn't have new rubber grip glue, but you might get that as well if you think you'll needed. My grip didn't peel off at all until now (more than 4 years of use), and if you are carefull you will not need to peel all the grip off, so you can keep the original glue.
Preparation
Before you start doing anything, make yourself familiar with the following pages to understand what you have to do:
- Canon EOS 6D Rear Body Panel Replacement on iFixit.com
- Canon 6D Teardown and Review on fixyourcamera.org - only the first 1:30 from the first video will be relevant for this.
Now, that you have an idea about what you need to do to open the back cover, let's start:
1. Screw organization
Since you'll have to deal with a lot of screws with different sizes and colors it will help you a lot to know which screw goes were. In my case the easiest way to do this was draw the camera with all the screws you need to unscrew and assign them an identifier (a number or a letter). Then I've put double sided tape on a piece of paper and annotated a place for each screw. As you unscrew them, place them on the double sided tape in the position they are assigned. The tape will keep them in place and the drawing and labeling will help you remember which screw goes where.
Below is my drawing. Please note that the bottom part of the drawing wasn't needed at all, since I only had to unscrew the screw on position "K". Also, based on iFixit suggestions, I didn't have to unscrew 5, 7 and 9 - so you might save yourself some time by following their advice.

2. Remove the viewfinder cover and battery door
For details on how to do it, check the iFixit link above.
3. Remove the screws from the side panel
You can see them in the step 4 on iFixit, but you don't have to peel of the whole rubber grip. Gently peel only the top part for the top 2 screws. Also you don't need to take that cover completely off.
Since you are working in this area, after you removed the 3 visible screws, move the plastic cover slightly to exterior to uncover the last screw from this side. Visible in the top-right of the iFixit tutorial on step 7.
4. Remove the top-right screws from the back
You'll have to peel off the rubber grip a little bit for this. Again, you don't have to peel it off completely, just the corner a little bit. Conveniently the screws are close to each other. You can see them in the step 7 from iFixit as well.
5. Remove the bottom screws.
Follow the instruction from iFixit step 6.
6. Disconnect the ribbon cable between the back cover and the camera body
iFixit's last step mentions a plastic spudger to do it, but you can use almost anything as long you are gentle enough to avoid breaking it (e.g. flat screw driver head, pen, guitar pick etc.). These ribbons connection are the highest risk points in this tutorial, so take your time with them and don't use too much force.
7. Disconnect multi-controller ribbon cable from the back cover assembly
Now that the back cover assembly is off the camera body, you can put the body aside and continue by disconnecting the multi-controller button from the back panel. I used a flat head screw driver and gently moved it side to side until it was easy to take out.
Once the ribbon is free, you can proceed to unscrew the button from the panel. Please make sure to easily press it against the panel, otherwise you might twist the whole button assembly while trying to unscrew.
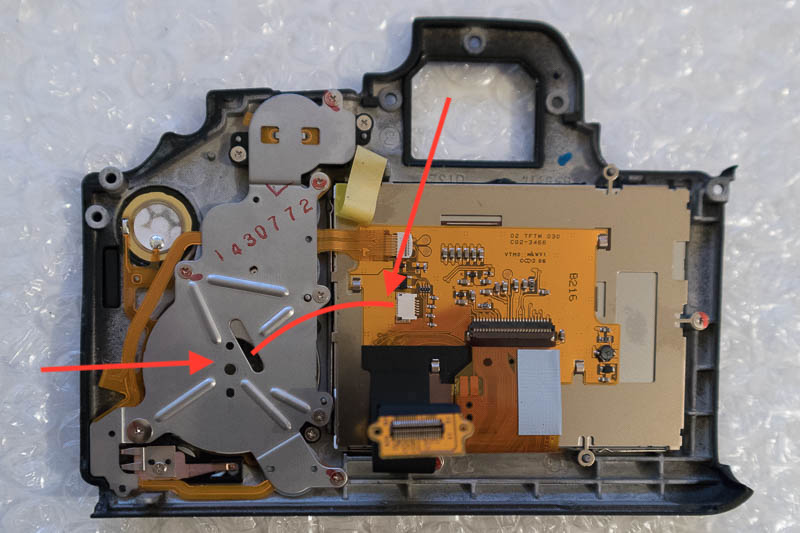
Top-right arrows shows the ribbon cable connector position;
Curved red line indicates ribbon cable position;
Left horizontal arrow shows the position of the screw that holds it in place;
Below and above the screw there are two small wholes where plastic pins are supposed to go in and keep it from twisting. For them to work you have to press on the button while you twist the screw.
8. Replace the button
Now with the old button out, you can proceed to place the new one in its place. Start by passing the ribbon cable through the metal opening and put back the screw. Make sure the button is positioned as it should: "Set" should be horizontally and the anti-twisting pins inside two small holes (above and below the screw).
9. Reconnect the ribbon cable
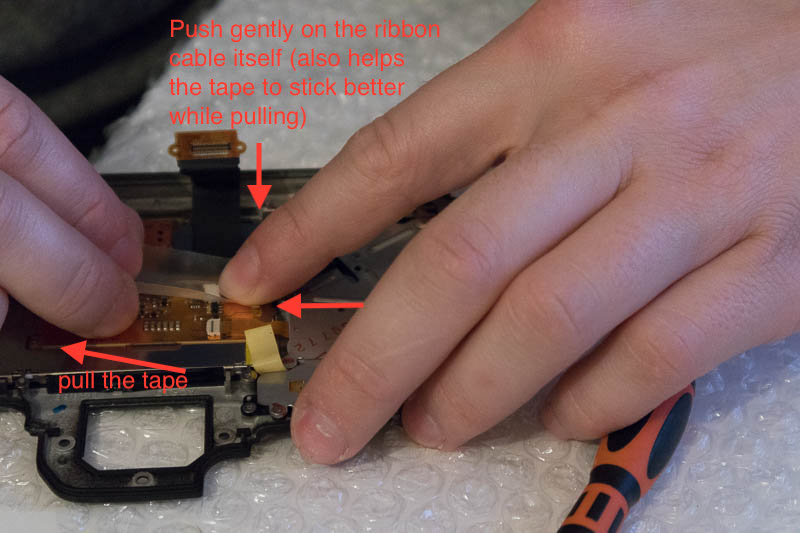
Changes are high to break the ribbon cable if you rush this step. I found easier to put it back using tape like in the photo below:
10. Test it
Before you put everything back, you should test that it works. To do this, you have to connect back the ribbon cable from the back assembly to camera body (disconnected as step 6 above), the battery door.
Make sure the battery is in, the SD card slot and the battery door are also closed otherwise the camera will not start.
In my case, the camera turned on normally and I was able to navigate through the menu using the new button. I also went ahead and tested all the other buttons on the back to make sure I didn't disconnect anything by mistake. You don't need a lens attached for this.
11. Put everything it back
If your tests don't reveal any issues, you can proceed to put everything back in reverse order.
Repairing the button
If you feel confident on your repair skills and want to fix the old button, this is how my broken button looked inside:


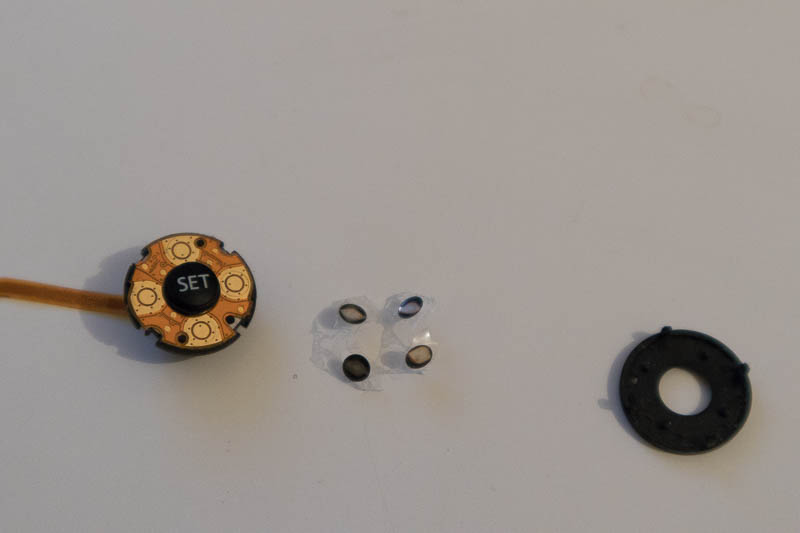
I managed to put the button back after I took it apart, but I didn't test it. If you go with the repair route and succeed don't forget to share your success with us in the comments.
My upgrade to 5D mark IV has to wait now and hopefully and with the money saved by doing this myself I can buy more lenses. What I learned after doing this and seeing all the tear downs on Youtube is that the weather sealing in this camera is a joke - do not trust it.
Comments4
Thanks
Thanks alot, very helpful fixed my problem
Repair
None of the directional buttons were working. I removed the plastic cover of the button without removing the back of the camera (just using my fingernail to gently pry it off). Obviously some moisture had got in at some stage as there was a fair bit of corrosion (green). There was also heaps of dust. I carefully cleaned it with cotton buds a small amount of isopropyl alcohol. I removed the dome switches and there was a lot of corrosion there too. Again, I carefully cleaned with cotton buds. When I put it back together the up and the left buttons were working, so it solved half my problem! I think the right and bottom contacts were too corroded. I might have a go at fixing those again later, but for now I'm happy to get half the functions back.
Repair success
I took the plastic 8 way cover off without removing the back of the camera (just used my fingernail). It was dusty and dirty back there with some corrosion. I cleaned it and two of the buttons started to work again. i then cleaned it with DeoxIT and now all four buttons are working. Cheap fix!
That's good to hear…
That's good to hear. Definitely cheaper and easier than my fix. I wish I knew about this before I started my fix.